Editing areas
You must go into the management system
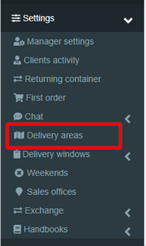
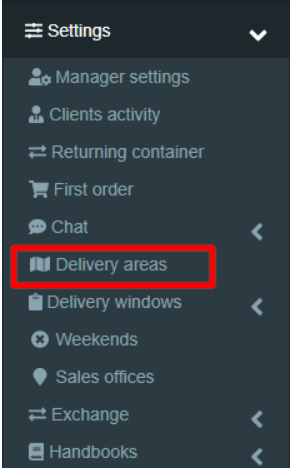
In the left column of the menu items, select the “Settings” section, then “Delivery areas”
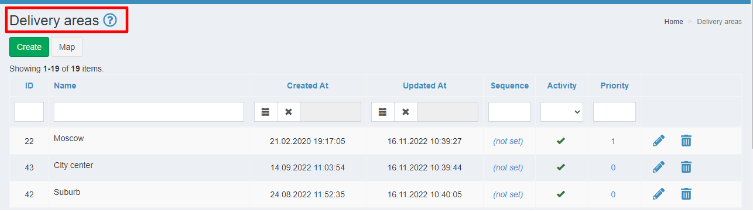
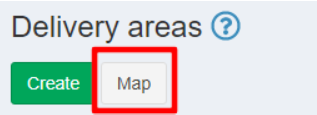
A page opens with all the existing areas:
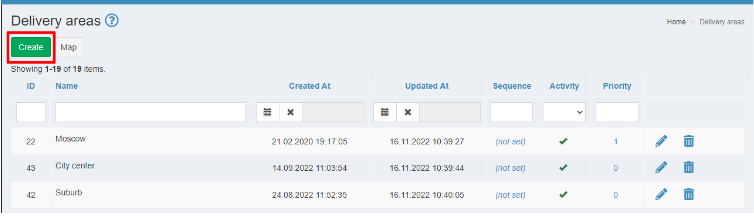
1. Click the “Create” button:
2. Fill in the data of the new area:
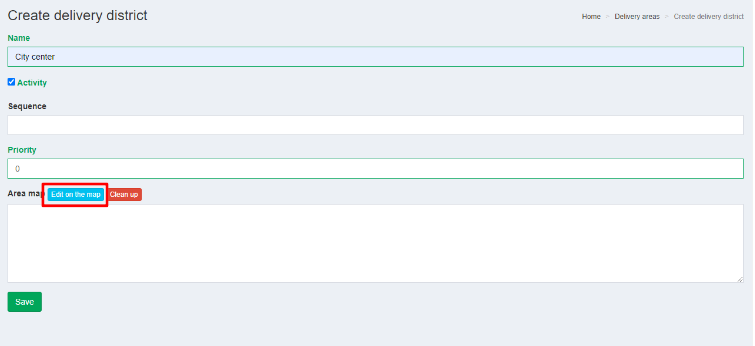
2.1. We prescribe the name of the area, which will be displayed in the list of all areas on the website and in the application:

2.2. Check the box “Active” — this is an active area. If the area is no longer included in the delivery area of orders, you remove the check mark.
2.3. Specify the sequence of the area. This is the ordinal number of the area, according to which the areas in the list are sorted.
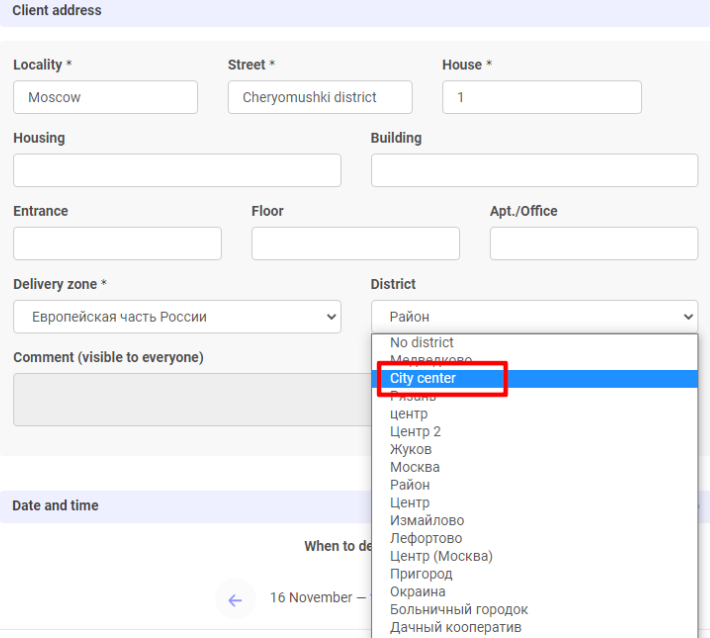
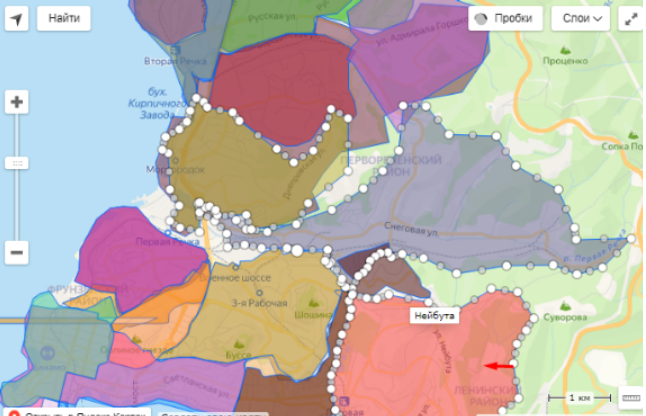
2.4. Creating a polygon on the map. These are streets, houses that enter the delivery area. When creating an area, we put the necessary points in the place where the area passes:
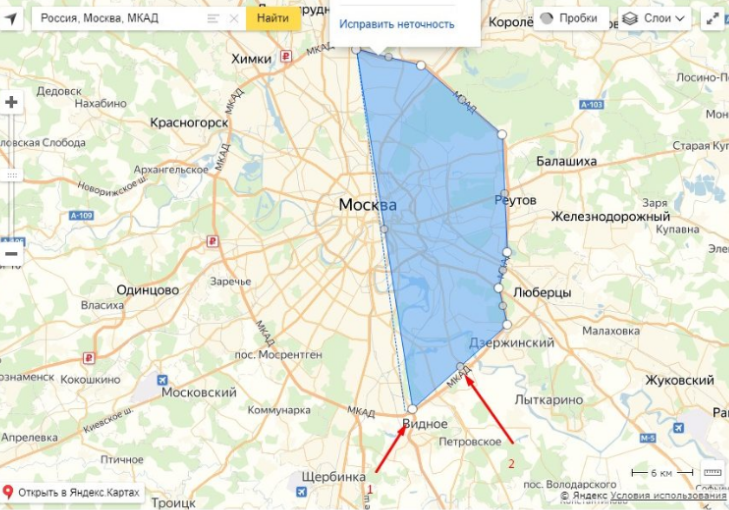
Start clicking on the map above the area that suits your area-interval.
White dots (1) — active points;
Gray dots (2) are potentially active points to customize the drawn polygon.
2.5. If you overlap one area with another, then you need to prioritize:

When 2 areas intersect, the system will determine the one with the highest priority.
2.6. When you are done, click on any point (1), click “Finish” in the drop-down list (2).
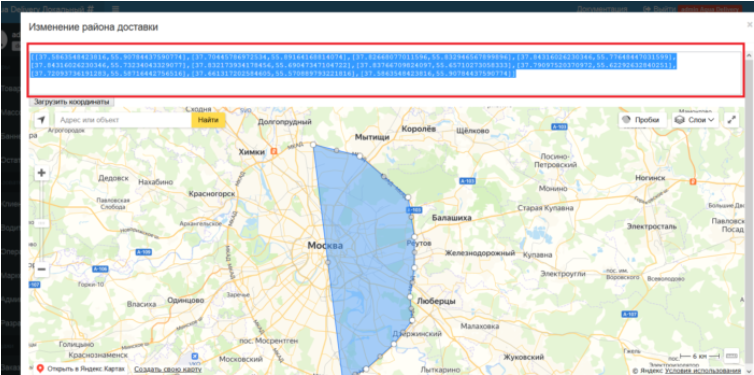
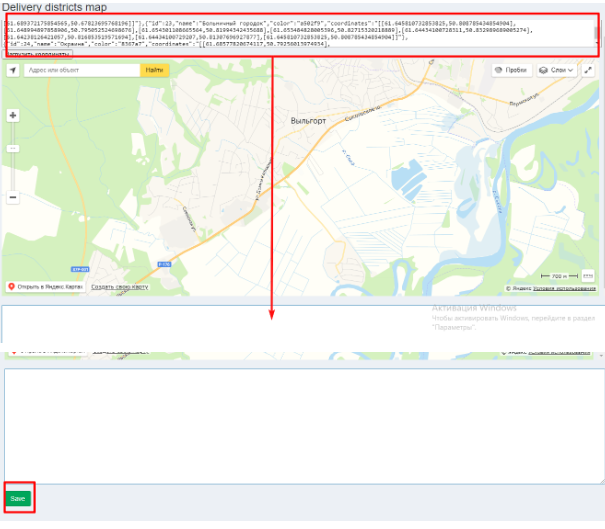
2.7. In the area above the map there is a field where the coordinates of the current polygon are displayed. You need to click in the field area, select the entire text and copy it. Next, close the modal window and on the form of creating / editing the area, insert the copied text into the Polygon field on the map and save it.
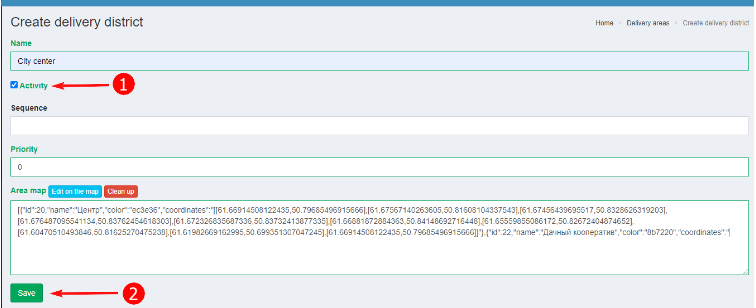
Be sure to set the Active check mark (1) — it should stand.
NECESSARILY! click “Save” so that the interval does not disappear (2).
The created polygon of the area is displayed on the Orders Page when the order is distributed:
Determining the area is required in order to calculate the cost of delivery and special delivery intervals. For example, an order is carried to distant areas of the city 2 times a day, not 4.
2.8. We save the area data.
Editing the map of areas
1.In the Settings cabinet, open the Settings section and select Delivery Areas.
2. Switch to Map mode
3. Copy the coordinates from the lower field and enter them in the upper field, then click the Upload coordinates button.
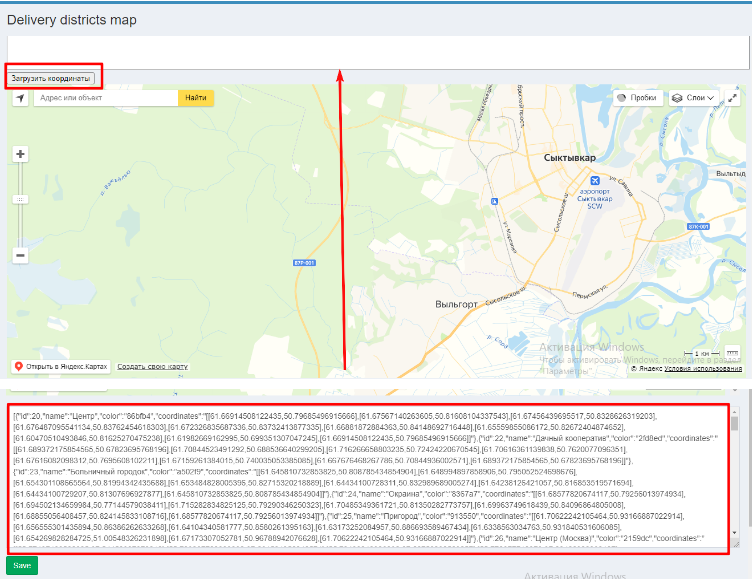
4. Then click on the area to make the points of the area boundaries appear, shift them to change the oblast of the area.

5. After making the changes, clear the bottom field, copy the coordinates from the top field and enter them in the bottom field. And save the changes.